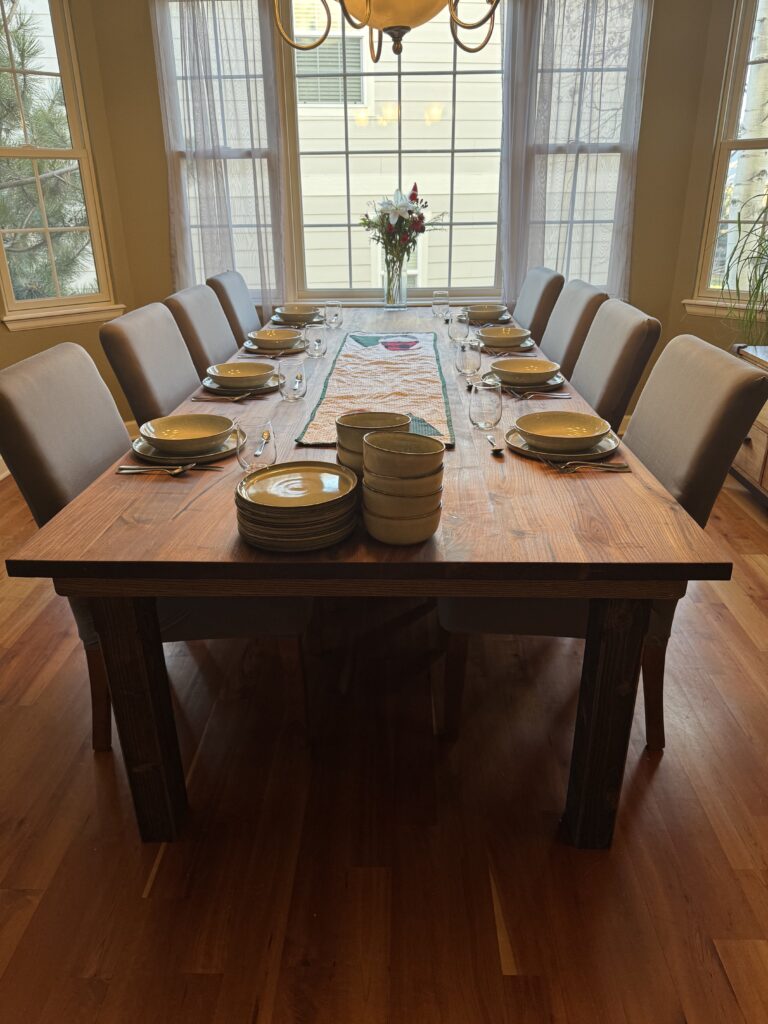
The finish on the table is called Sample 73. It is … fantastic!
About the table
I originally built this table in 2017. We wanted a table that would better accommodate our extended family and didn’t like the available options at our local furniture stores.
It was a simple build and this post is more about the finish on the table, so here are the basics of the build process. I bought 12-foot pieces of black walnut from a local lumber supplier, had them surface three sides, and cut the fourth side on my table saw. I assembled them into a table top using dowels and glue. Trimmed the ends, filled knots and cracks with epoxy, and sanded like a madman.
At the time, I had very little experience with finishes, but decided to use Minwax Polycrylic in clear satin. I thought it would be hard enough to tolerate some abuse and clear enough to show the natural beauty of the wood. It was odorless, easy to apply, and dried quickly. It was fine for the first few years but the finish degraded quickly.

About the finish
Sample 73 is a hardwax oil finish formulated by Chris Salamone at Qwerk Tools. He also produces YouTube videos with Shaun Boyd as Four Eyes Furniture. In fact, their video on finishing is what got me thinking about re-doing my dining table.
Chris claims to not be an expert on finishing and says he just tolerates the finishing process. But don’t listen to what he says – look at what he does. He is an excellent furniture maker so of course he’s more tuned in to how he designs and makes furniture, but the completed product is amazing in part because of how he finishes it.
He took the time to formulate his own finish because in his words, he “wanted a finish that was easy to apply and protective enough to give great results with just one coat.” Sample 73 was, despite the name, the result of hundreds of iterations. When you put that much effort into developing a hardwax oil, I’d say you qualify as an expert on finishing!
By the way, you won’t find it on Amazon or in any Home Depot store. I bought Sample 73 directly from Qwerk Tools and am not an affiliate.
Prepping the table
The old finish on the table, it turned out, required a lot of sanding. I started with 80 grit but moved to 60 grit when I realized how long it was taking. Then back to 80 and to 150. I used some woodfiller to take care of some cracks and dents, sanded those spots with 150 grit, and then finished with 220 grit. My Dewalt handheld orbital sander handled all of the sanding.
One sidenote: I used woodfiller rather than epoxy because I had the woodfiller and didn’t want to run to Home Depot just for epoxy. However, the woodfiller was a lighter color than the walnut so I went over it with one of those stain pens. It turned out fine, but in hindsight I wish I had used epoxy.
I went over the table with a wet (more than damp) towel to raise the grain. I’m not sure this was necessary – it was something I did when I built the table – but I didn’t want to apply the new finish and then find out I should have raised the grain. Once the table was dry, I went over it with 220 grit again.
I vacuumed the table using a soft brush attachment and wiped it down with a damp (not wet) cloth. You want the cloth just damp enough to pick up any remaining dust. Keep wiping until the cloth no longer picks up any dust.
Applying the finish
Sample 73 comes in two bottles – one for the oil and one for the accelerator. The instructions are clear and straightforward. Mix the oil and accelerator in a 3:1 ratio. Work in small sections to ensure full coverage and the mixture is thoroughly rubbed in.
I tackled this 40-square foot table by applying the oil in eight, 5-square foot sections. It took me about two hours. I finished the last two sections much faster than the first two sections because I noticed the mixture was getting thicker. I think it was starting to cure in the mixing bowl. The thicker it got, the more muscle was required to rub it into the wood. It turned out fine, but if I were to do it over again I would only mix enough oil and accelerator to cover half the table (and do that twice).

Conclusion
We used the table after just 48 hours, good enough for a 90% cure according to the instructions. We couldn’t push Christmas dinner back to wait for a 100% cure! It’s hard to tell in pictures, but the tone is super rich and the feel is very natural. I can’t help but run my hand over the table – I mean the finish on the table – every time I walk by it!

Even better, it cleans up easily with a damp towel. My kid spilled some Sprite and didn’t tell me (he knew I would have flipped out). I noticed the next day when it had dried to a shiny, sticky residue. It didn’t penetrate the wood; it sat on the surface and mostly evaporated. Some light rubbing with a damp towel and there was no trace of the residue. I only applied one coat of the finish!
We’ve since hosted two more dinners and while some people rave about the table, most rave about the finish on the table. Down the road, I look forward to a much easier maintenance routine. Light sanding, apply another coat of Sample 73, and done!


