Laser engraved water bottles was one of the first things I did when I got my laser. I wanted to learn how to use the rotary accessory and I had some old water bottles and tumblers I didn’t mind sacrificing in the name of my laser education. Maybe I’ll share that experience in a different post.
I mention this because it was the reason I had some confidence when I took on a job for Justin Geanetta at Cook St. Roll-Offs and Recycling. He was going to a trade show and wanted to have some water bottles with logos to hand out. It was a small job with plenty of lead time. He had a logo and shipped the water bottles direct to my doorstep. We agreed on the price without any haggling. Piece of cake, right?
Client logos are not always laser-ready
The logo Justin sent me wasn’t terrible, but it was more appropriate for a website.

I did a quick check-in with Justin to make sure he understood how the laser removes paint to reveal the metal and doesn’t add color. I explained that a black and white logo would look best and he agreed to send one over. In the process he asked if I could add his website and phone number. I said sure, but that made me want to recreate his logo from scratch so that I could more easily accommodate future requests.

Here’s how I did it, but you have to promise not to laugh! I’m not a trained graphic designer so I tend to do what I know how to do, not what I’m supposed to do. In this case, I started in Google Slides because it was easy to create the two rectangles and layout the text. I found the Colorado “C” online and imported the file to Google Slides. I exported the slide as an image and pulled it into Adobe Photoshop. In Photoshop, I erased the parts of the rectangles I didn’t want (the parts inside the “C”), created the transparency layer, and exported the image as an SVG file. That SVG file is what I pulled into xTool Creative Space.
It’s a familiar lesson in the trade. Just because a client says he has a logo doesn’t mean the logo is suitable for your needs. I generally charge $50 when I have to do logo work. It doesn’t always cover my time, but it’s great when the client asks for minor changes that you’re able to accommodate because you have the raw files.
Water bottles are not all painted the same
Water bottles are generally made of stainless steel or aluminum, and powder-coated or painted. Yeti, for example, manufactures stainless steel drinkware finished with a type of powder-coating called DuraCoat. It pays to know these details because they determine the success or failure of a laser-engraving job.
For this job, despite having already tested the logo on another water bottle, I went through several iterations and ended up using very different settings. To give you an idea, here are the starting and end points on my xTool P2S (55-watt CO2 laser):
| Setting | Start | End |
|---|---|---|
| Power | 60% | 100% |
| Speed | 200 mm/sec | 80 mm/sec |
| Pass | 1 | 1 |
| Lines | 100 lines/cm | 180 lines/cm |
| Mode | Bi-directional | Bi-directional |
The starting point worked great on my practice bottle and failed on the client’s bottle. It’s because my practice bottle was powder-coated steel and the production bottle was painted aluminum. I hate it when this happens because it means I wasted two bottles. After a few more failed attempts, I stopped to do some online research.
I found some advice to reduce the power to prevent the laser from melting the paint. I reduced the power to just 20% and the results were worse so I didn’t go any lower.
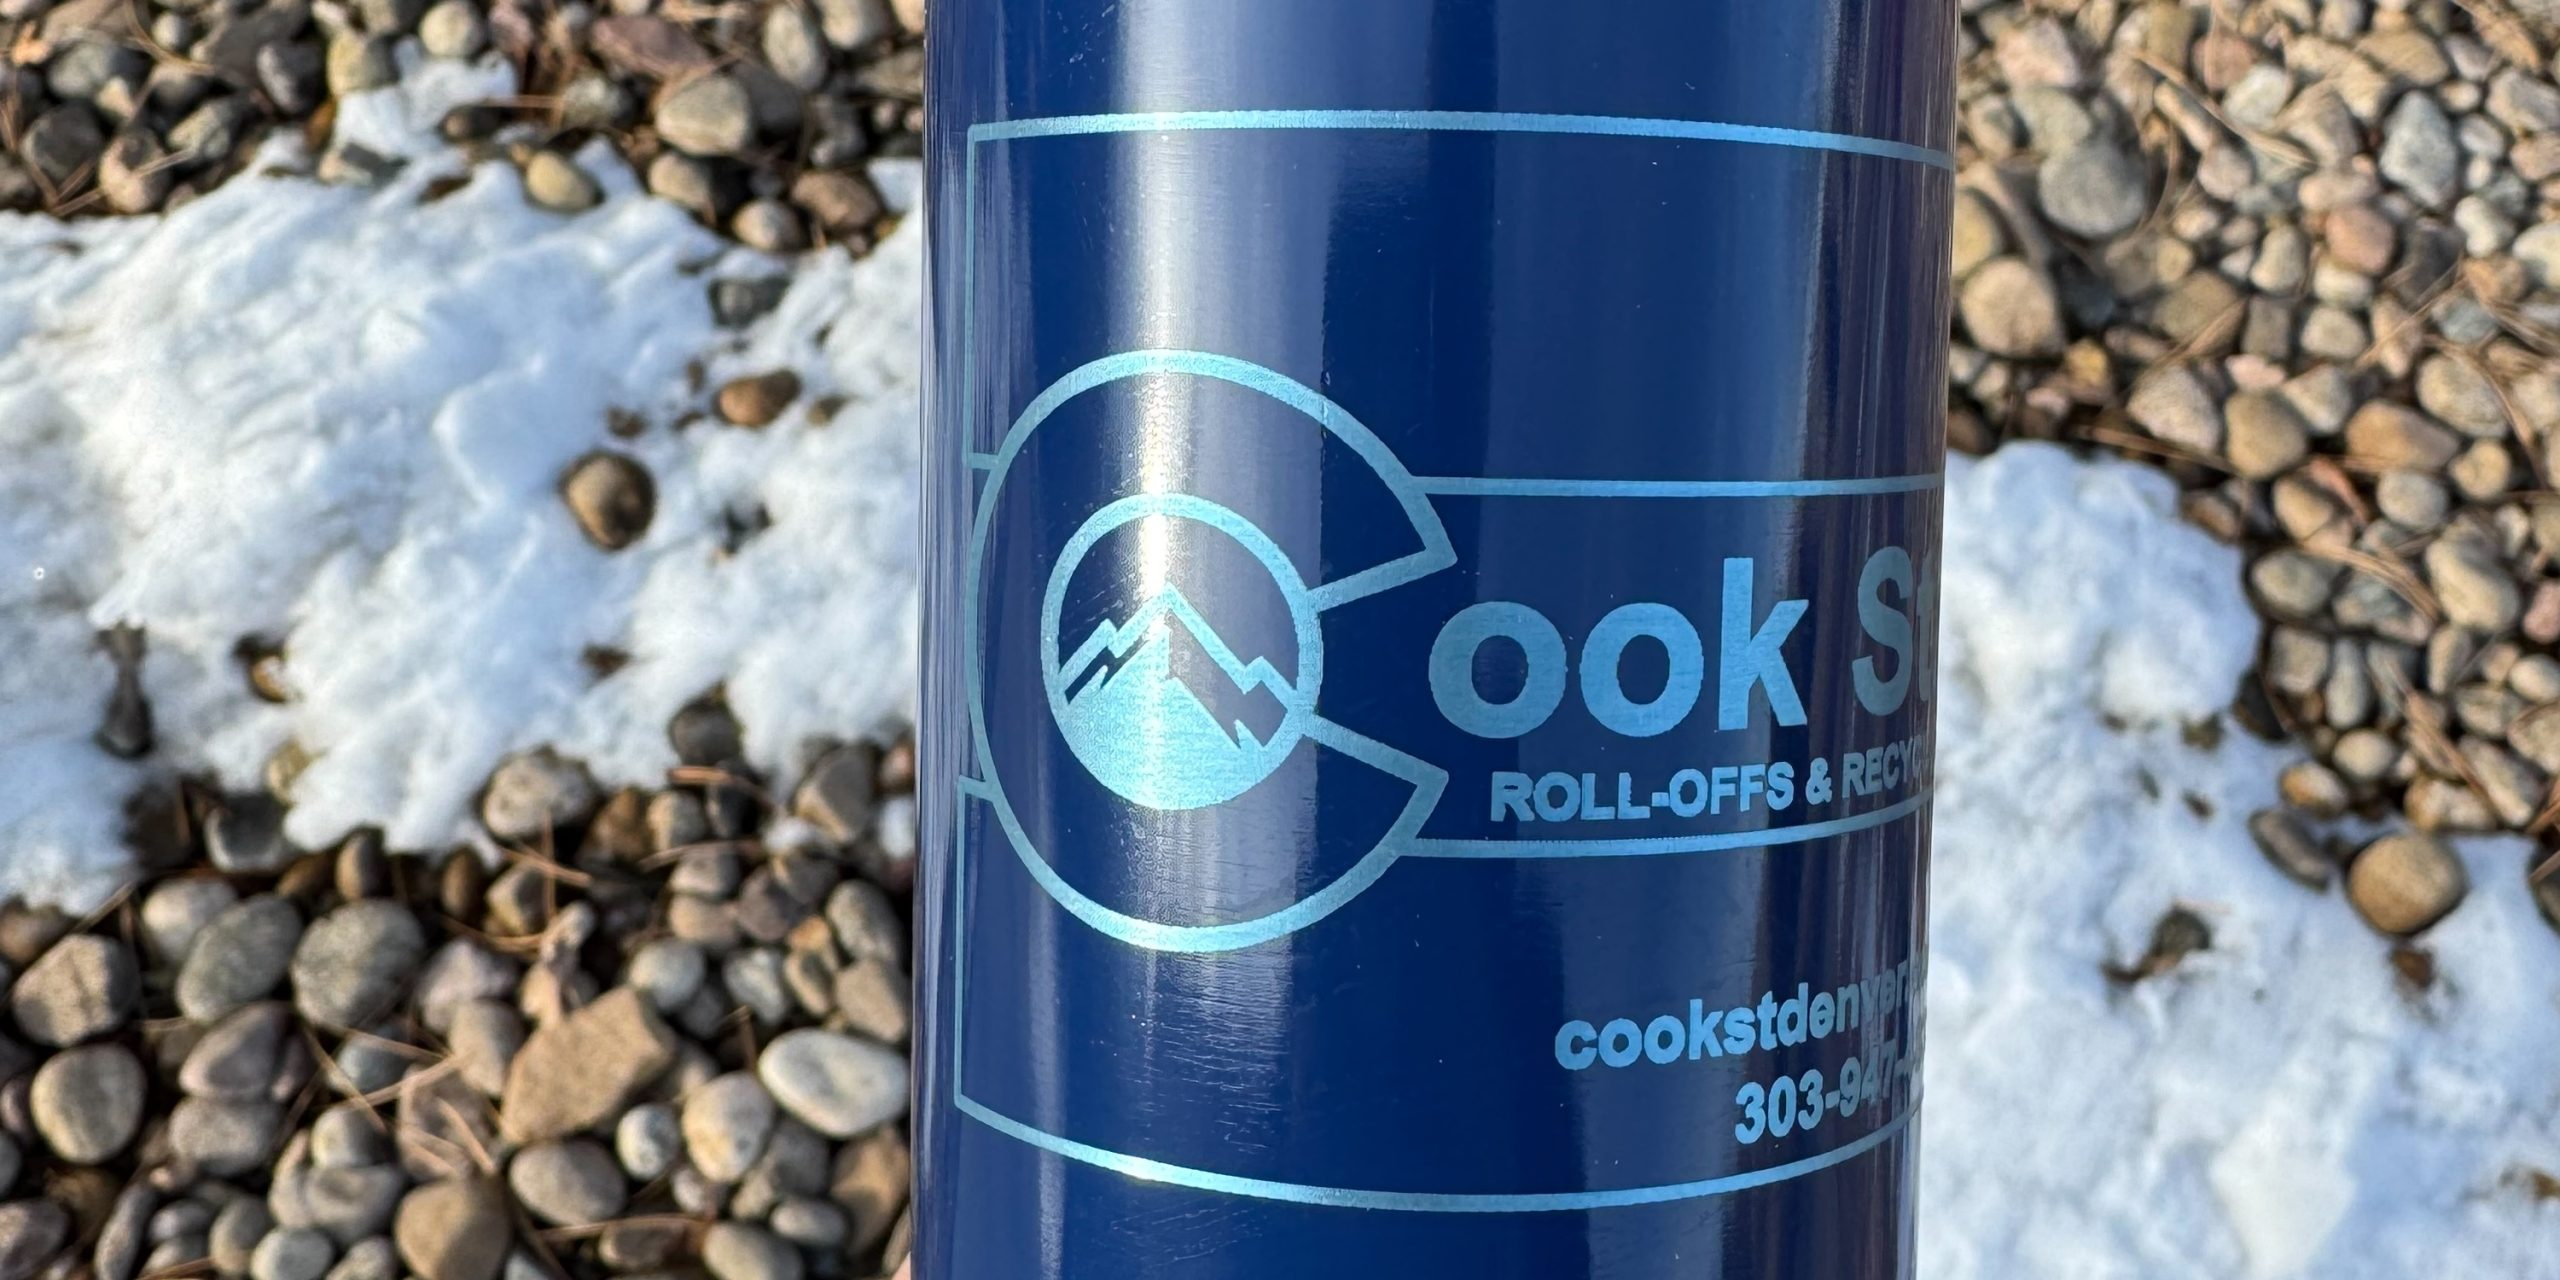
I found other advice to increase the power and decrease the speed to burn off stubborn paints. The results were better, but not great. I settled on 100% and 80 mm/sec at 180 lines/cm.
Apparently, some paints, combined with the high boiling point of aluminum, can react with the laser to produce a bluish hue. For reference, aluminum has a boiling point of about 4500° F and stainless steel is closer to 2530° F.
If you’re wondering, I did try running a second pass. I theorized there would be less paint to remove in a second pass, so maybe the reaction to the laser would be less, and I’d be able to remove the bluish hue. It didn’t work. A lot of people say not to do second passes on a rotary anyway. The more detailed the engraving, the greater the probability of the rotary introducing inaccuracies in a second pass.
I showed it to my wife and she actually thought it looked cool. Justin agreed and appreciated all of my testing and research. Production time!

Production notes
Each water bottle took about 20 minutes to engrave. Reducing the speed or increasing the lines/cm would lengthen the job time without noticeable improvements in quality. Justin wanted 48 bottles, so it amounted to 16 hours of laser runtime not including my test runs.
The logo probably took me about three hours but some of that is my learning curve using Adobe Photoshop and Illustrator. Today, after many more hours of logo-making under my belt, I think I could get it done in an hour and that’s including time for a couple of rounds of feedback (create draft, send proof, get feedback).
It took me another couple of hours to set up the rotary that enables laser engraved water bottles. Almost all of this time was my learning curve again. I fiddled with the rollers before removing them to try the chuck, and then I fiddled with the various sizes of chuck arms to see what would work best with this style of water bottle. After that, I spent some time working on positioning the rotary within the laser. To ensure repeatability, I cut a piece of 1/8″ plywood to use as an alignment tool so that the rotary was perfectly aligned with the laser gantry and in the same position on the shelf every time. All of this time is on me.
After the laser engraving was done, it probably took another hour to polish and dry the water bottles, and repack them in their original boxes (the bottles came individually boxed). By the way, I use LA’s Totally Awesome cleaner to wash off laser residue and polish the underlying metal – highly recommend!
So the gross job time was around 24 hours, but the net job time after subtracting what I would chalk up to my learning curve was closer to 18 hours. When giving price quotes, I try to think in terms of net job time to improve the odds of getting repeat business.
Final thoughts
Would I do laser engraved water bottles again? Yes, but this experience created two principles I’ve applied to almost every subsequent job.
Principle 1 says it’s better to be in control of the digital assets, meaning I have the artwork used to create the logo. Clients always want to provide a logo to reduce the cost, but that doesn’t mean the logo is right for use in a laser or on a particular product. In this case, I was able to take the client’s logo as a starting point, convert it into something that would show better on a laser, add the text he wanted, and create it as a vector file. This control allows me to accommodate changes relatively quickly and easily not only for the current job, but also for any future jobs.
Principle 2 says it’s better to be in control of the product that is being laser engraved. In this case, it would have been great to steer Justin toward a water bottle I had used before. He can still shop for the combination of style, color, and price that works for him, but I should have given him some parameters (eg, power-coated, stainless steel, brand X or Y) where he’d be assured of great results.
I’ve since done a few other jobs with laser engraved water bottles and these two principles were money! Literally, these principles will save you time, ensure a successful job with the client, and increase the odds of repeat business.


