A customer recently asked me to build a couple of mud kitchens for preschoolers. I said, “Sure!” I didn’t even need to think about it. Simple build. Two of them would easily fit in the bed of my truck. I could probably knock them out in a weekend and still get in a round of golf. And boy, was I wrong!
Custom mud kitchens
AFTER I said I’d do it – savvy move by the customer – the big caveat dropped. They wanted me to demolish a couple of sandboxes and repurpose the wood for the mud kitchens. Even then, I thought it was a manageable project. It would take two weekends instead of one, but no big deal.
And then the smaller caveat dropped. They said very casually, if there’s enough wood, it’d be great to get three or four mud kitchens. I couldn’t help but think I was negotiating with someone much smarter than me. But it was the same design across all four mud kitchens, meaning I’d be able to work more efficiently by grouping similar tasks.
I advised that buying new lumber would be more cost-effective than reclaiming the sandbox wood, but they chose to proceed anyway. Apparently, the sandboxes were donated, so it was important for them to reuse the wood. They didn’t want the sandboxes anymore because it was too hard to keep sand in and critters out. But the donation would live on as easier-to-maintain mud kitchens.
Demolition and restoration
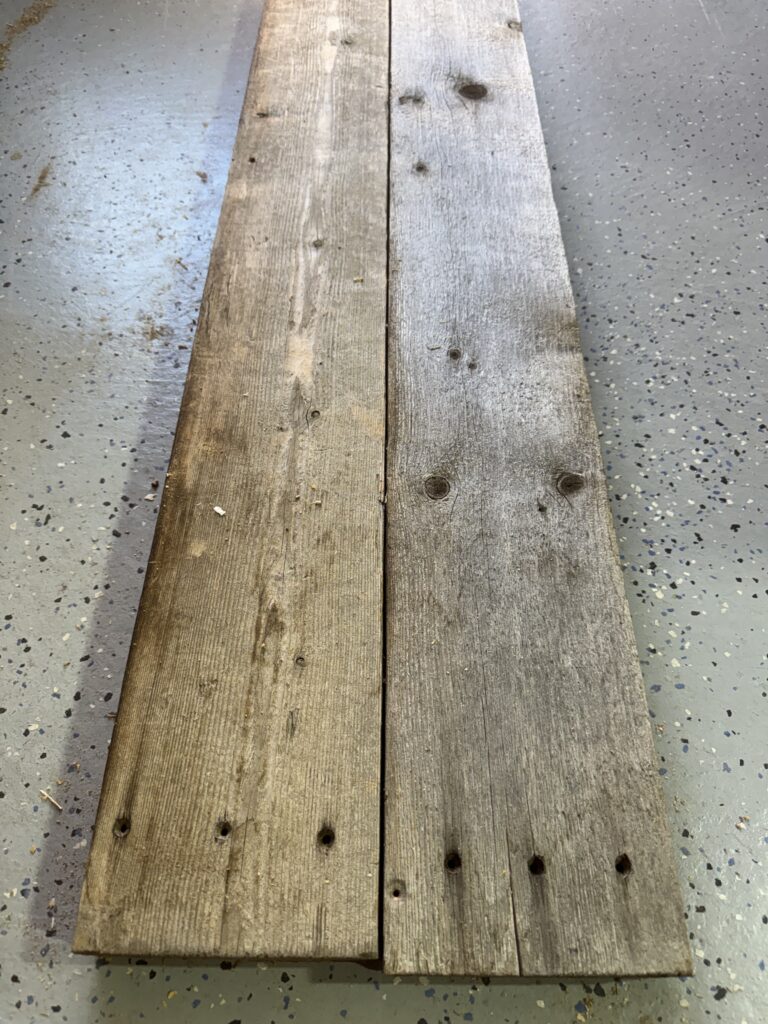
The longest part of the project was, by far, the demolition and restoration. It took me two full days to take apart two sandboxes. They were huge, 20′ by 3′ by 2′ boxes with 4×4 posts dug into the ground about 18 inches. They had stapled weed barrier fabric all around the interior.
But the real problem was that it rained during the demolition. By the time I brought the wood to my workshop, sand and mud caked the soaking wet boards. I let it dry for about a week, then swept off as much of the sand and dirt as I could. It took a couple of hours just to remove all of the staples.
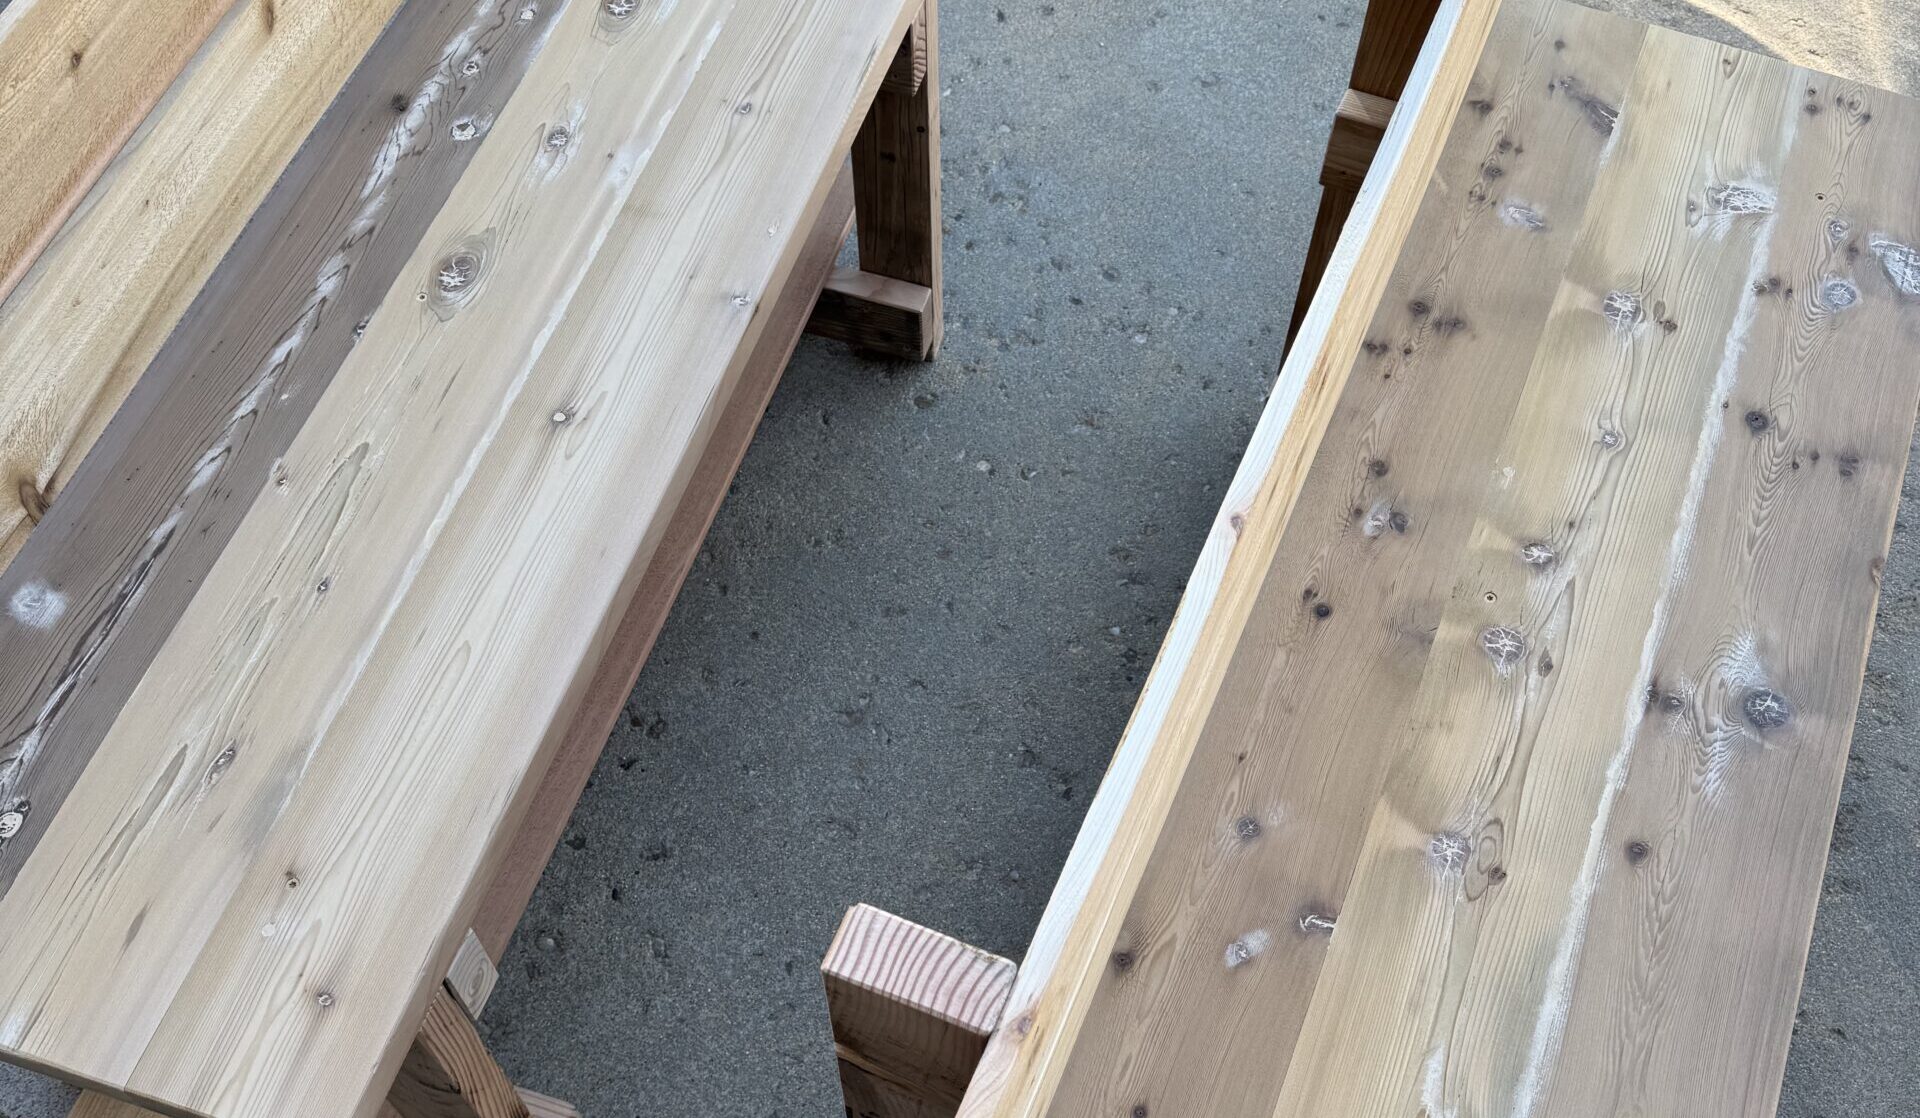
The milling process took twice as long as it should have. Even though I’d somewhat cleaned the boards, there was still a layer of fine dirt and sand lodged in nooks and crannies. When I ran the boards through the planer, it would create a cloud of dust. It was so bad I moved my planer out of the workshop to the driveway. After every other run, I had to stop and blow dust out of the planer. To a lesser extent, I had the same problem running the boards through my table saw to get clean edges.
It was three full days of mill work. But we had rainy weather during this time, so I’d often have to stop and pull the planer back into the workshop. Three days of mill work was more like a week in elapsed time.
Build and finish
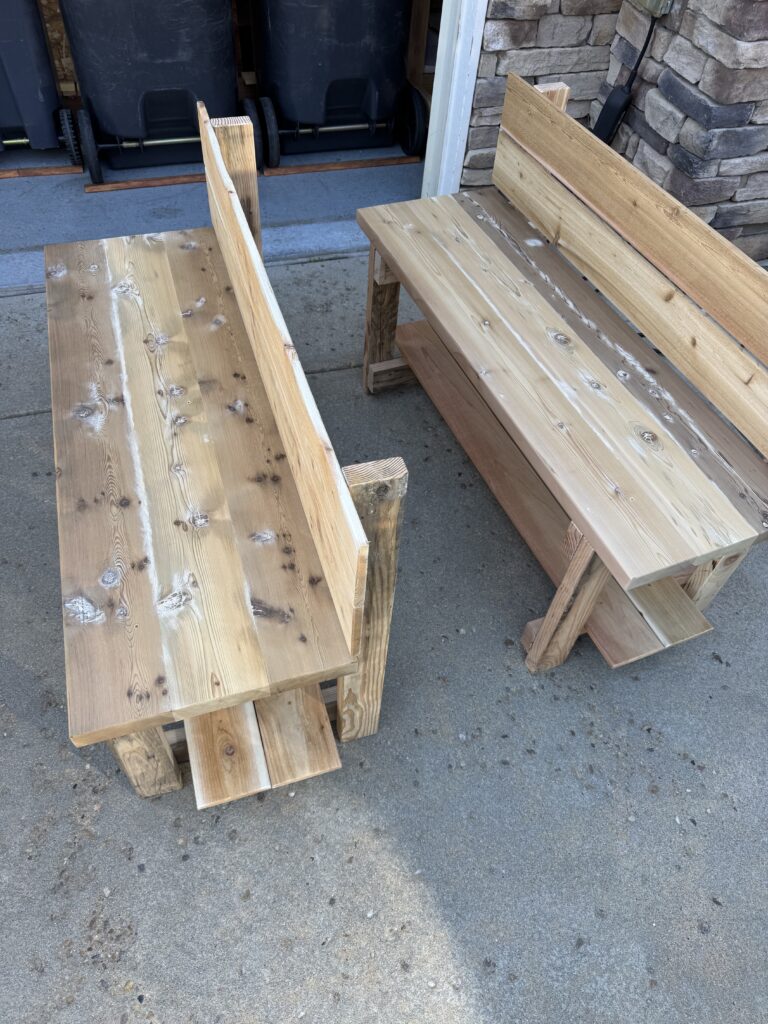
Mud kitchens are simple, and the repurposed sandbox wood limited my design options. As a result, I’m not going to show all of the steps. Here are the first two mud kitchens. They are four feet wide with a 15-1/2 inch deep countertop. The countertop height is 20 inches. I ended up buying fence pickets for the lower shelf and the backsplash.
Here are all four of the mud kitchens. I strapped them to the fence behind them so they can’t fall on the children. Notice how two of them turned out cedar red while the other two are natural pine? That’s because I ran out of Thompson’s water seal after the first two and bought a new can without carefully checking the color! Thankfully, the customer didn’t mind.
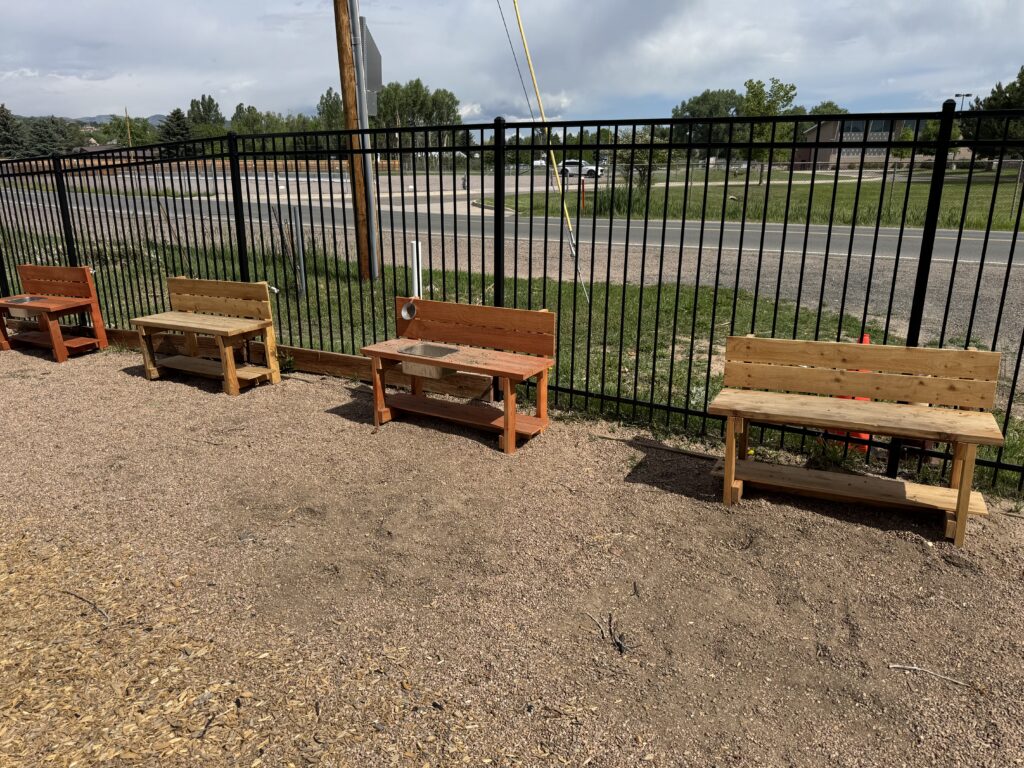
By the way, I used the Tilswall Cordless Paint Sprayer to apply the water seal. It was quick and resulted in a very uniform color. Clean-up was easy with just soap and warm water. Check out my full review.
Final thoughts
Did you notice there are stainless steel tubs in the two that are red? The customer added that request after seeing the first two. Outsmarted again! I learned some important lessons on this project.
- I regret repurposing the sandbox wood. It was too much grueling work for too little return.
- I should have waited for better weather for the demolition. The customer would not have been happy about the delay, but the extended restoration work (due to the mud) delayed the project anyway.
- Remember when I thought building four mud kitchens would be easy by grouping tasks? That would have been true in a larger workshop, but I could only build two at a time in my one-car garage workshop.
Overall, the project was more work than I anticipated. Some of that was poor planning on my part, some was Mother Nature, and some was savvy negotiation strategy by the customer. I didn’t lose money on the project, but I didn’t make any profit either. The good news is the customer now wants a fifth mud kitchen, and I get to buy the wood this time!